
By Cody Barnes
Where do I start?
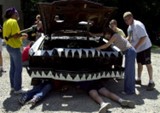
Ok, so you have a local derby you want to run. You have your car and you’ve convinced your friends to help with the offer of a 24-pack of anything cold. But what are we doing now?
WARNING: These steps are for building the typical “chain and go” car in Wisconsin or Iowa. These steps do not always apply for more advanced classes, and check your local tracks rules!
Step 1: Stripping
This step is probably the most fun but can backfire quickly. The first thing you want to do is get the windows out, because a spider web crack is going to hinder your derby time. STOP, as much fun as it sounds, do NOT smash out the windows with a hammer. Unless you have 2 weeks to vacuum the glass out of your seats and the flooring, this is not the way. There are several different, safe options to remove the glass:
-Wire. You can shove a metal rod attached to some cable wire through the sealing material around the window and with a sawing motion, you can remove the front and rear windows.
-Sawzall. With a tile chipping tool can be the quickest way to remove windshields, beware. The vibrations could crack tempered glass and shatter standard older glass.
Once those are out, it’s time to look at doors. This step is probably the easiest in the whole process. Lower the window and start prying on the door panel, there will be wires attached, DO NOT CUT, there are connecting pieces you can disconnect safely. If you cut these wires, something in them can cause the car not to work (I can’t explain it but it happens), slow drain on the battery, or a zesty shock. But when the panels and wires are taken out, a few simple screws or bolts can be removed to take out the door windows, they slide out really easy. (Use gloved hands and not plyers because the glass will shatter)
Step 2: Stripping PT 2
It seems odd to split these steps up but they are completely different animals. At this point you are glassless, but all of that flooring, seats, and seatbelts need to go.
Honestly, I don’t have an ideal method of doing this step because it depends on the type of car. But the first thing you want to do unless you don’t mind being covered with whatever sat in that car, is vacuum it! It doesn’t gotta be pretty but there a ton of stuff that will be floating around that could be avoided.
Next, start removing all the seats, even the driver’s seat. (Keep the driver’s seat in tact.)
Now, START RIPPIN. Take out every bit of fabric or carpeting on the floors. Use a knife, or anything to get it off. Once that’s done, pull out the seatbelts (except the drivers) and cut them at the end with a knife, save these belts for later.
One of the most dangerous parts of stripping the car is remove the airbags. Watch a YouTube video for your corresponding vehicle on how to safely remove the bag. One wrong step and you could lose a hand or worse.
Step 3: Put it together
Alright, you have a naked car, it’s time to start looking like a derby car!
Put your driver’s seat back in the car.
Be aware of the position of your gas tank. If it is behind your axle, you will need a fuel cell (Tank inside your car). Every car’s fuel system is different and I would absolutely recommend talking to a mechanic or derby driver that has done this before. When I was 6, my grandfather and father were working on a gas tank and one stray spark caused an explosion that gave my grandfather 3rd degree burns, father 2nd degree, and I was miraculously unharmed (Thanks to grandma who made me wear snow pants that day (listen to your grandma). So, always be safe when handling fuel.
You will want a cradle for your battery. Because many cars (for ease of jump starting) have their batteries at the front of the engine, which can be dangerous and could cause your derby time to end really quick.
Something like this works for the battery cradle but many people fabricate their cradles.
Then you want to run your battery cables (Likely spliced with some jumper cables) from the engine into the cab. (Fasten with zip ties)
Step 4: Now it’s looking like a derby car
Your car is coming together, but there are 3 major parts you need in order to run in your typical chain and go.
You need a door bar. Flat piece of steel, concrete in the door, circular bar, or anything that is thick and will stop the door from collapsing from 2 thousand pounds coming at you at up to 30 miles an hour. Torch your holes and get thick bolts (angled out) with some of the biggest washers you have seen.
Now you want a tubular piece of steel that is as thick as you can carry and fit in the car that runs from door post to door post and is welded in. The positioning you want is right near the middle of your back on the seat, because your passenger door is fair game and you don’t want your car collapsing in on you.
Number-9 wire. It sounds like an old love song from the ’60s but this will keep your doors closed, you safe, and other drivers safe. This is where you get to go crazy with the torch, but make sure you know how to operate one and it is properly serviced. I once was torching my door holes and the torch exploded in my hand because it was not properly maintained (live and learn). But you want at least two points of contact on areas where there is a crack. So, you want wire wrapped around all posts or pieces of car that extend where the windows were. Then you want holes at about shin or knee level in the doors near the posts and wire ran through there.
Step 5: Paint it up
Your car looks mean, it looks clean, uh…what number are you?
As an announcer for derbies, my absolute biggest pet peeve is drivers that do not have a visible number on the top of their car.
This, well I don’t like it but it’s better than nothing! What you want is sheet metal that is bent like a T so that the top of the T can be drilled into the roof of your car and the bottom can contain your (hopefully brightly colored) number on the top. So, upside down T with your number, as well as your number on both doors. Anything after that, I beg you, please! Get creative! Don’t just do a standard jet black look. And I have a little incentive for you to make it look the best. Wanna win up to $500 just for painting your car? Well, some shows offer a “Best-of-Show” class where you can win if you’re the best painted.
Step 6: Can I derby now?
Yes, yes you can! Once your car meets the local rules, it’s time to smash that beast up! Remember, everything we have talked about, and ask your local drivers about strategy and you’ll have a rip roaring good time!
Next time we will talk a bit about the what derby means to the community and how to be a part of that.
Never been to a derby? Here’s a podcast talking about what the experience is like.
Till Next time, Derby on!